In this guitar lesson, we're going to learn the CAGED system. The CAGED system is a very important concept that applies equally to both rhythm guitar and lead guitar. It doesn't matter what style of music you play, or if you play acoustic guitar or electric guitar, this method of fretboard navigation is essential for all guitar players.
Open Chords
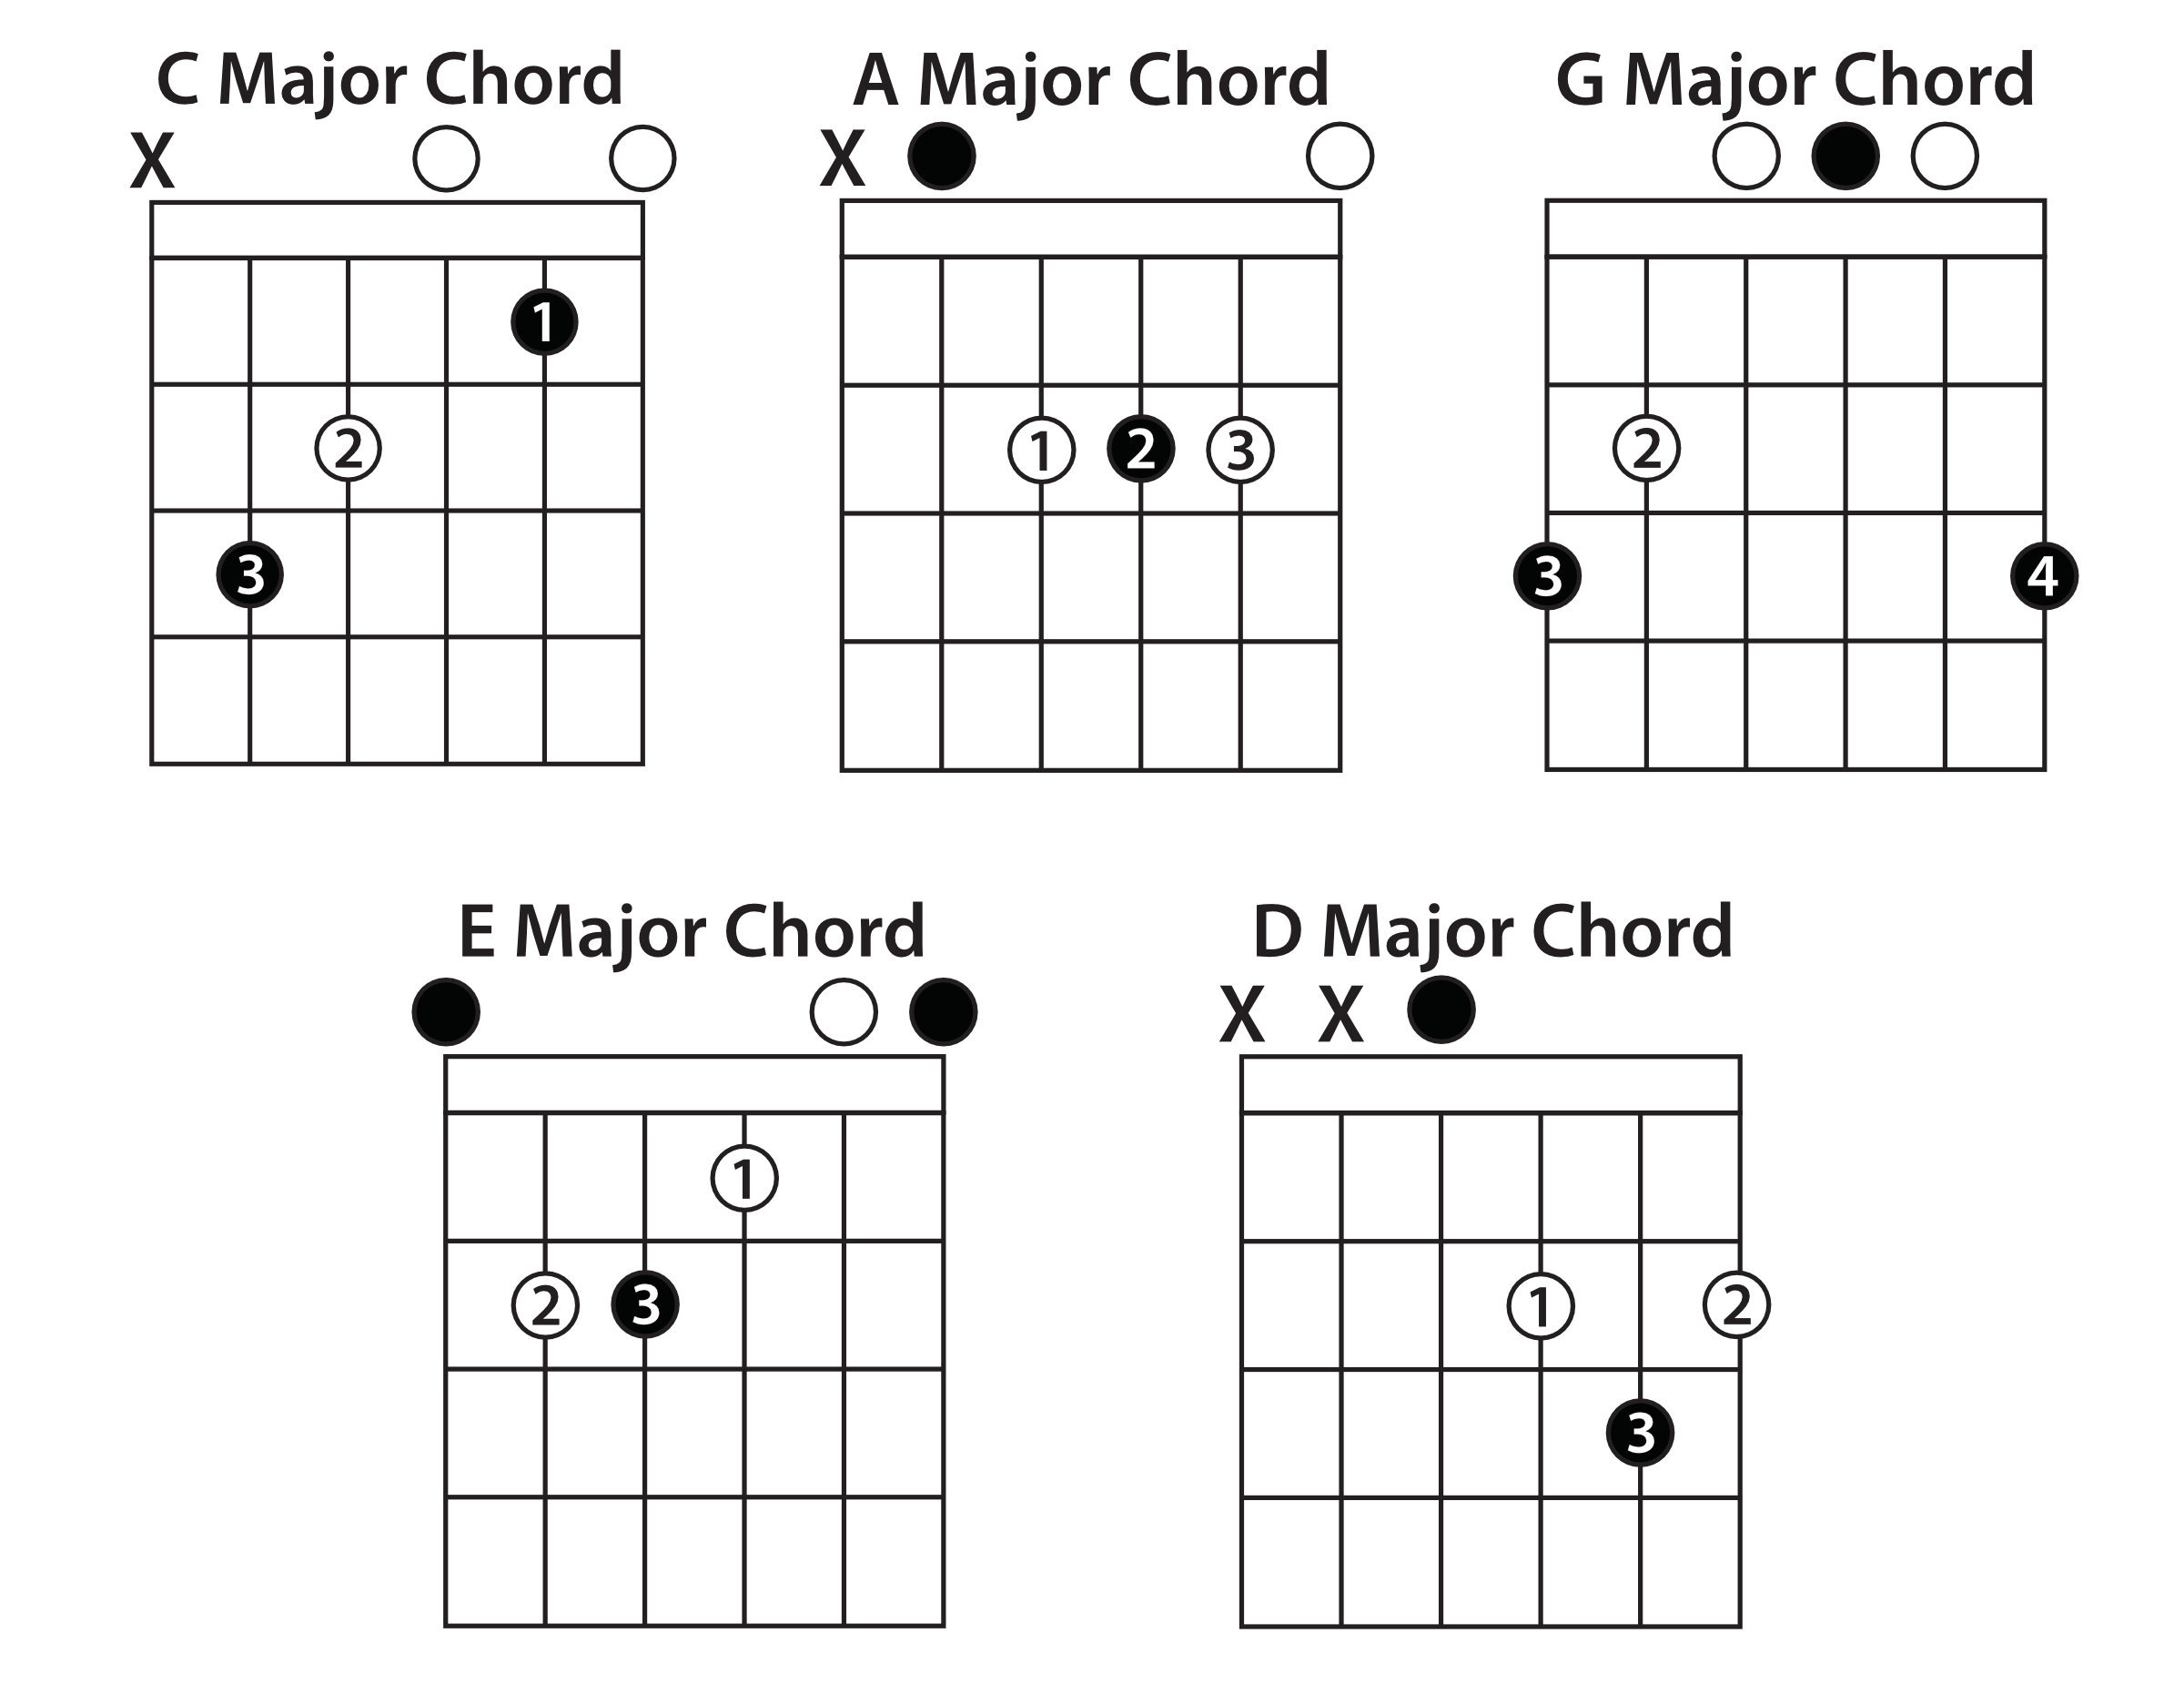
The first step to understanding the CAGED system is knowing 5 basic open chord shapes. These chords are C major, A major, G major, E major, and D major.

Bar Chords
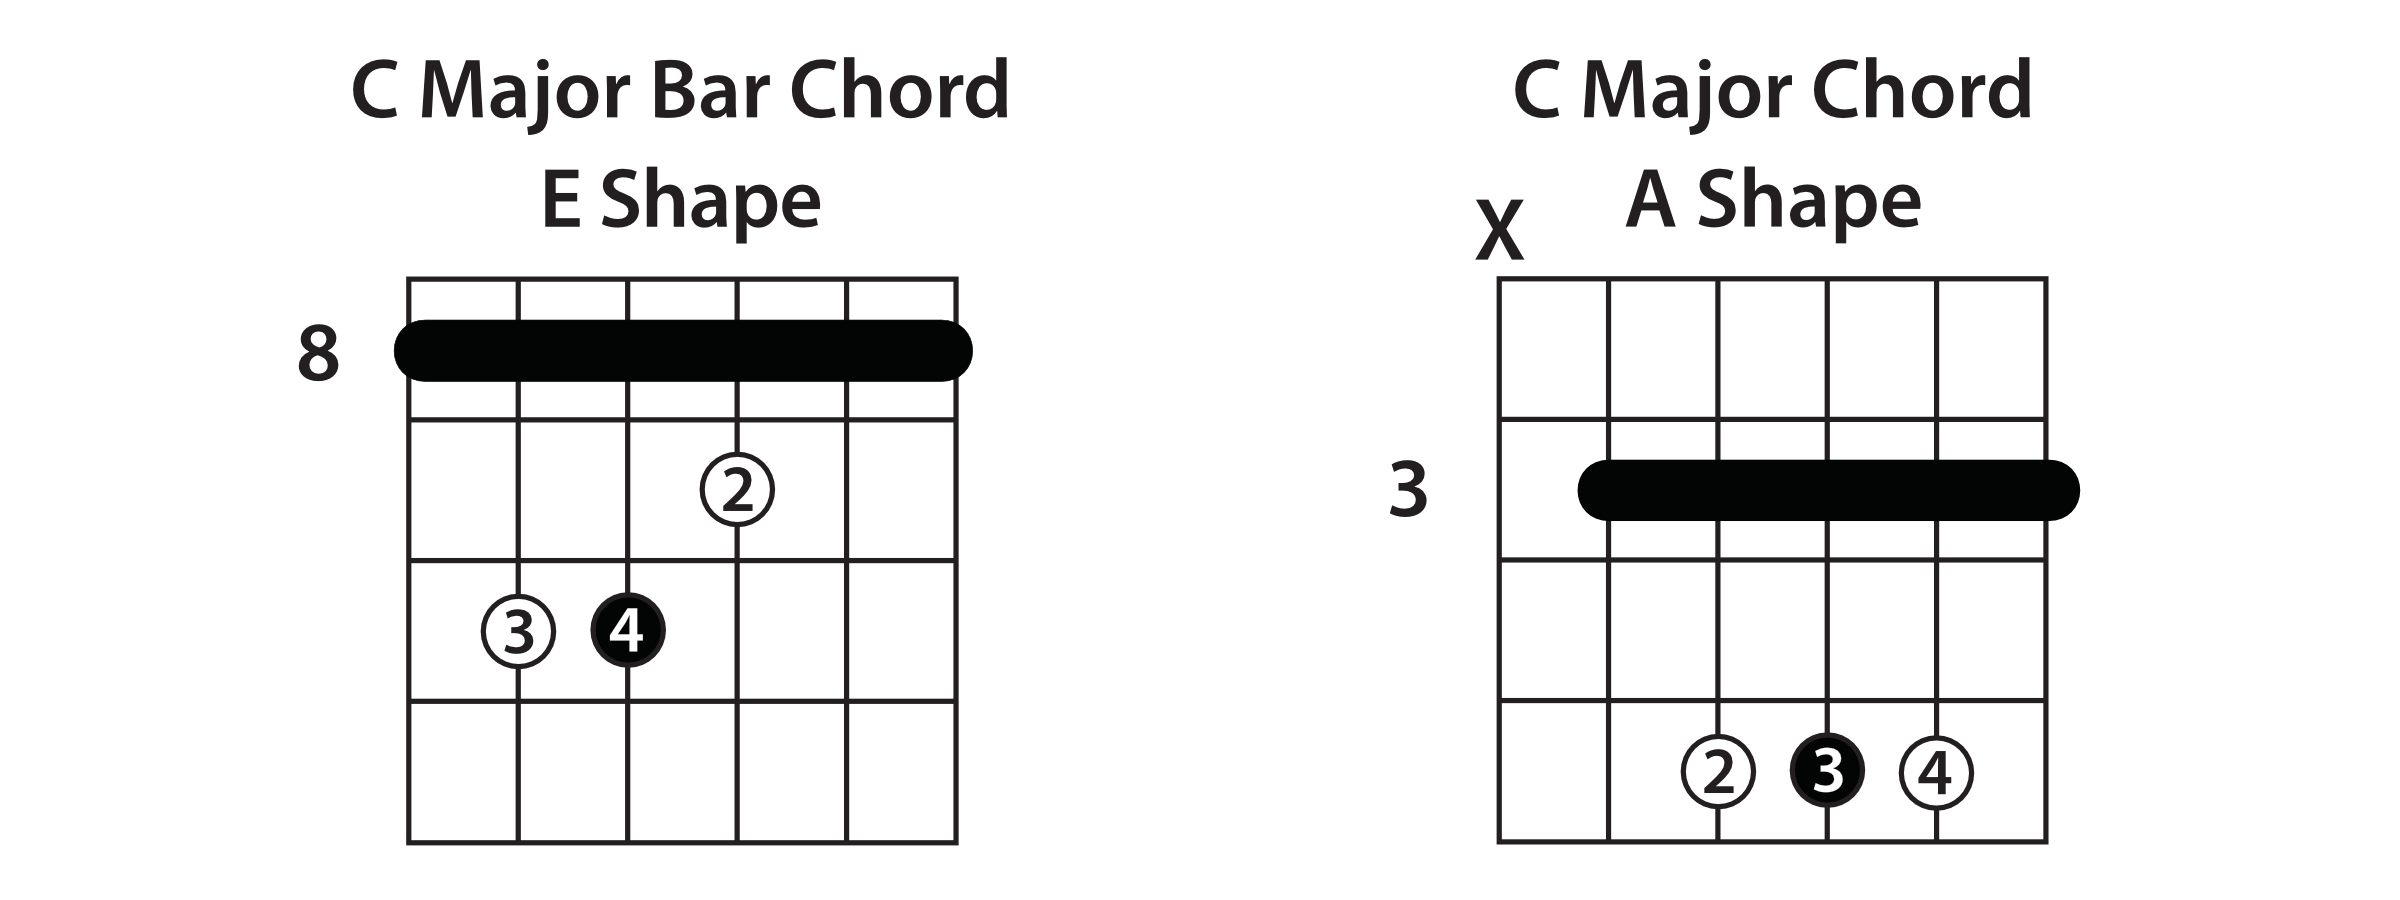
The next step for getting a grasp of the CAGED sequence is understanding that all these open chord shapes are moveable. A great example of this, is the two standard bar chord shapes that you probably already know. These are the 6th string root note E major bar chord shape and the 5th string root note A major bar chord shape.

The thing a lot of players don't know is that you can apply this same concept of movability to your other chords as well. For example, you can take your C chord and make a D bar chord by moving it up 2 frets and baring at the 2nd fret. The same sort of thing can be done with our G chord and our D chord as well.

Linking The Chord Shapes Up The Fretboard
C Shape: Since we're using the C chord as our very first chord. The C shape is just our regular open C chord.

A Shape: Now we'll use an A shape to play a C chord. Whenever we move to our next shape, you can look for the root note of the starting chord that's furthest up the fretboard. That note will become the root note that's lowest down your fretboard in your next chord shape.

The key here is to visualize both your C shape and your A shape together. Memorize the root note locations to make it easier to recognize these shapes.

G Shape: The next chord in the CAGED sequence is the G chord shape. The same rules apply here: Take the root note furthest up the fretboard from your A shape, and use that as the root note lowest down your fretboard in the G shape.

Put your A shape and your G shape together so that you can visualize the two shapes as one. Again, be aware of where all your root notes are.

E Shape: The next chord shape in the sequence is the E shape. This one is pretty standard since it's just a regular E major bar chord shape.

Visualize the two shapes together and make sure you know the locations of your root notes. Try moving back and forth between the two shapes.

D Shape: The last shape in the CAGED system is the D shape. Look for the highest root note in your E shape, and use that as your lowest root note in your D shape.

Put both shapes together and recognize all the root note locations. Practice moving between the two shapes.

Application
The CAGED system applies to guitar playing in a ton of different ways. The great thing about it is that it's used equally in both rhythm guitar and lead guitar. You'll find it applies to learning chords, scales, arpeggios, and a vast number of other concepts. I've included a jam track that you can download at the top of the page. You can use this track to practice moving between the different shapes. It's important to drill the CAGED system by going one chord at a time. Once you have the C chord down, move onto applying the CAGED sequence to other chords and keys.
When you're ready for the next step, sign up for The Major Scale Masterclass. It's a completely free series that will help you to understand more essential guitar theory and how to better navigate your fretboard.

