If you want to learn how to play guitar but don’t know where to start you are in the right place. This lesson will show you how to play your first real song on the guitar in five easy to follow steps. These steps include The Guitar Fundamentals (How To Hold The Guitar and The Basic Numbering Systems For The Guitar), Basic Strumming, Basic Chord Shapes, Changing Chords Smoothly, and Your First Song. Everything you learn here can be applied to both the electric guitar and the acoustic guitar.
This lesson on how to play guitar was put together so that you could start seeing progress immediately. If you are looking for a more thorough series of free video lessons for new guitar players you should check out the completely free Ultimate Guitar Toolbox.
Throughout this lesson you will get some tips to help you avoid a lot of the trouble areas that most new players experience. This will keep you from getting frustrated and give you a great foundation for everything you will learn in future guitar lessons.
1. The Guitar Fundamentals
The two fundamentals we will cover here are how to hold the guitar and the three basic numbering systems for the guitar.
How To Hold The Guitar
The Casual Method: There are several ways that you can hold the guitar, but we will just cover the most common one in this lesson. The casual method of holding the guitar is when you simply place the guitar on your right leg, if you are right handed, and pull it in close to your body. The temptation as a new guitar player is usually to let the guitar slide down your leg so you can see what is going on. Try to avoid that. Pull the guitar in close to your body and sit up straight.

For more information and a dedicated video lesson on the different ways of holding the guitar check out How To Hold The Guitar.
The 3 Numbering Systems
Frets: The metal strips that go along the neck of the guitar. The one farthest to your left, if you are right handed, is the first fret. The next one to the right of the first one is the second and so on. This is very simple but it’s important to understand for when you start learning chords and scales.
Fingers: The numbering system for the fingers on your fretting hand is very simple but also important. Your index finger is your first finger, your middle finger is your second finger, your ring finger is your third finger, and your pinky is your fourth finger. Again, super-simple but really important for when you start learning where to put your fingers to make chords.
Strings: The final numbering system is for the open strings of the guitar. The thinnest string is the first string and the thickest string is the sixth string. Pretty easy to remember.
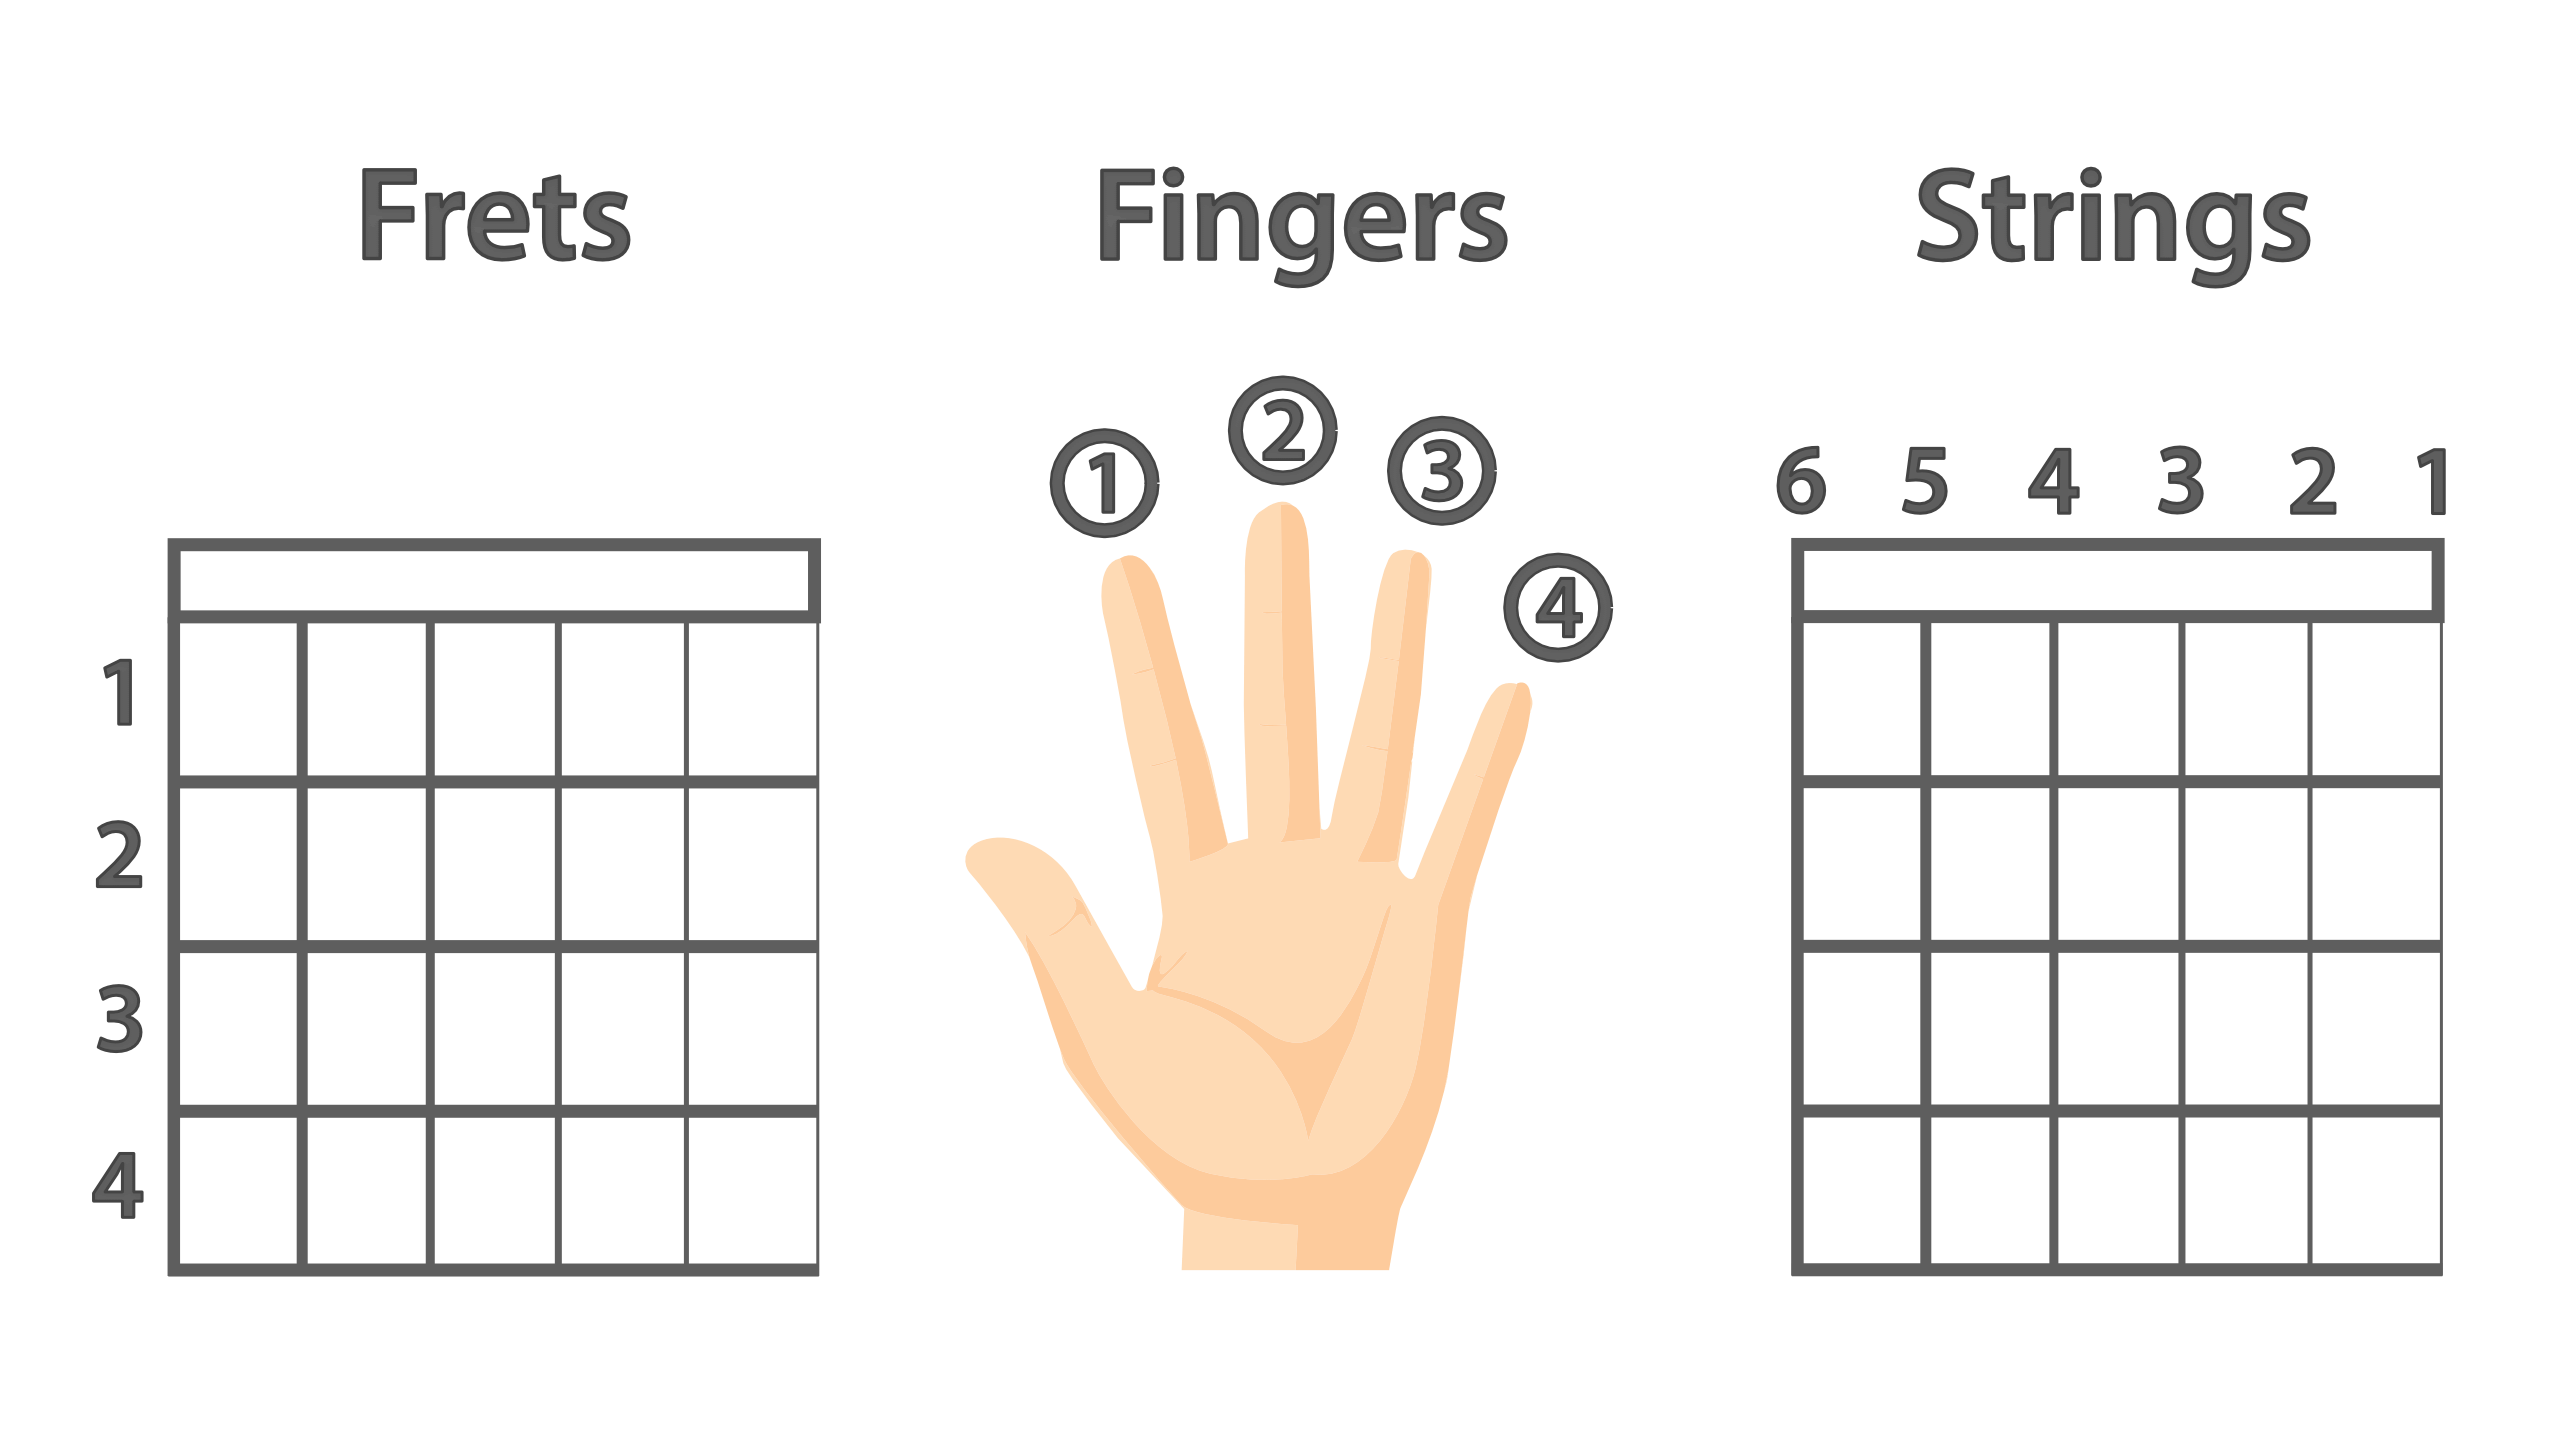
For more on the 3 Numbering Systems For Guitar check out Fingers, Frets, & Strings.
2. Basic Strumming
The two main things we will be focusing on here, are using a guitar pick and strumming technique.
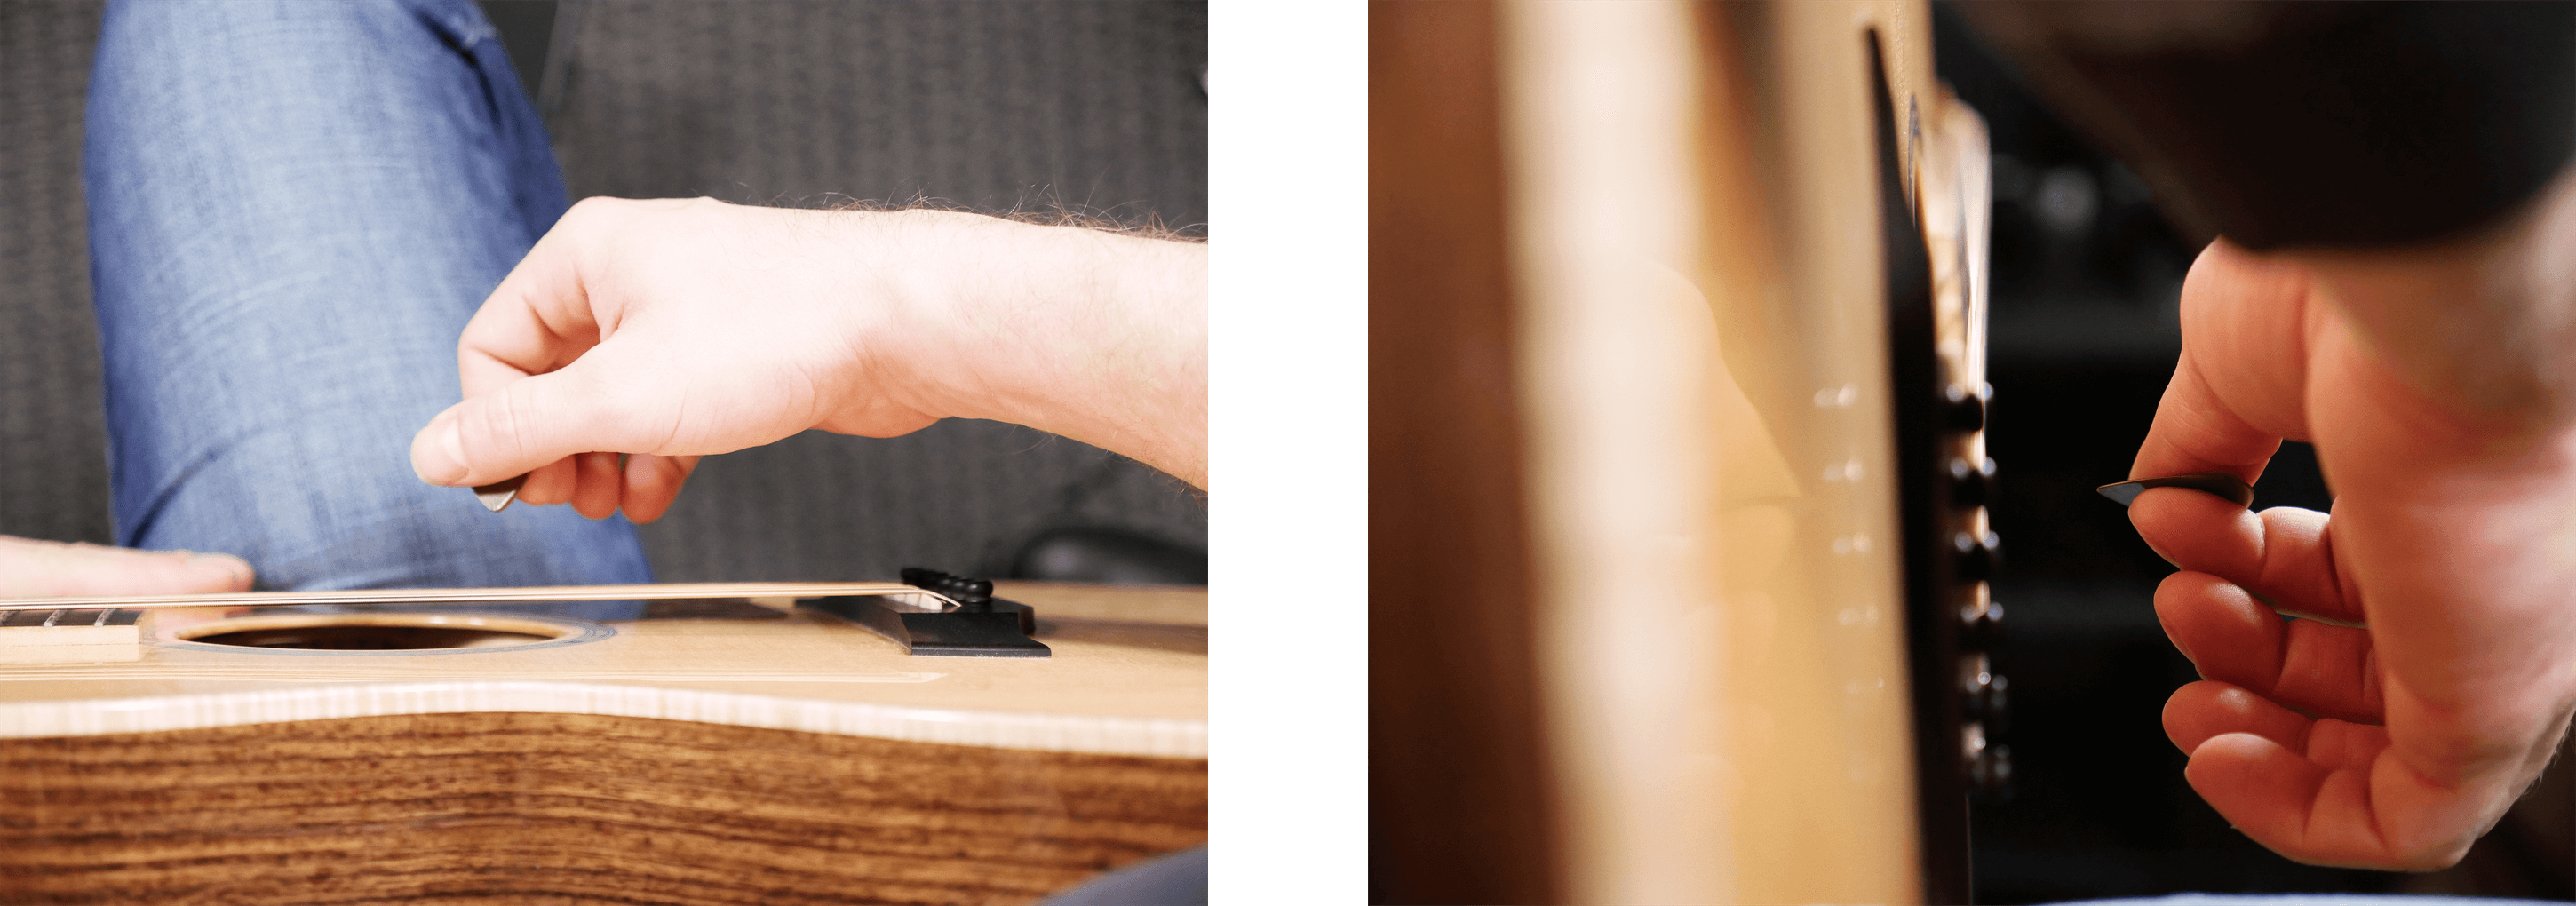
The Guitar Pick
Choosing A Pick: Lot’s of students ask what type of pick they should use. I would recommend starting with a standard shaped medium thickness pick, about .73mm. From there you can try thicker or thinner picks and decide what you like for yourself. If you don’t want to use a pick you don’t have to. You can simply make the strumming motions with your thumb or thumb and index finger.
Holding A Pick: How you hold the pick, the pick grip, is pretty subjective. You can start with a pretty generic pick grip and experiment from there. Put the pick on the pad of your thumb and then come down on it with you index finger. Try to stay relaxed. Many newer guitarists have trouble holding on to the pick when strumming. If that is the case you can always try holding on to the pick with your thumb and first and second fingers. That just gives you a little more control and stability. Experiment with different pick grips and see what works for you.
Strumming Technique
Strumming Tip: The best analogy I’ve heard for this is to pretend like you have a feather stuck to your pinky with some honey. Pretend like you are just trying to shake that feather off. The motion of your wrist and your elbow working together is a great mechanic to think about when strumming. It helps you stay relaxed and keeps you from using just your elbow for the motion. Take your pick and try a few relaxed downstroke motions. Be sure to think about the honey and feather analogy.
Upstrokes: Upstroke strumming can be pretty challenging at first. I have a couple of tips for you that will make this a bit easier. First of all, when you do an upstroke you don’t have to strum through all six strings even if the chord you are playing uses all six strings. Most people generally only hit the top 3-5 strings with their upstrokes. Tip number two is to only use as much of the pick as you need to strum at the appropriate volume you need for the song you are playing. If you dig too much of the pick into the strings you will probably have trouble getting it through all the stings. Try some relaxed upstrokes and be sure to keep the previous two tips in mind.
Counting: Let’s talk about counting now. Most songs are in four-four time. That just means that there are four beats for each measure of music. Think about when you hear a drummer count in a song “1 2 3 4”. Those numbers are the beat of the music. Now try counting out loud “1 2 3 4” and strumming with downstrokes on the “1” of each cycle as you count. When you do this you are strumming whole notes. Now try strumming on every number as you count using downstrokes or alternating down and upstrokes. If you strum on every number you will be strumming quarter notes.

If you want more in-depth information on strumming check out this video lesson on How To Strum The Guitar. Also, be sure to sign up for The Strumming Bootcamp. It's a free 5-part video series that will take your strumming to the next level.
3. Basic Chord Shapes
The first two easy chord shapes we will be learning are E Minor and D2.
Before we get into learning chords, you'll want to make sure your guitar is in tune. Here's a video lesson on How To Tune Your Guitar.
Chord Tip: Stick your fretting hand out with your palm up like you are simply holding an apple. This is a good posture to think about when making chords. Put your hand up to the neck of the guitar and place your thumb on the back of the neck. Don’t kink your wrist too far one way or the other.
E Minor Chord
To play your E minor chord put your 2nd finger on the 2nd fret of the 5th string and your 3rd finger on the 2nd fret of the 4th string. Make sure your fingers are right behind the fret and that you are coming down right on the very tips of your fingers. You will also want to make sure that your fingers are not brushing up against the neighboring strings and muting them. You can check out the diagram for this chord on this page. Once you have the chord in place strum each individual string slowly to make sure the chord is clean and clear.

D2 Chord
The second chord that you need to learn is a D2 chord. Place your 1st finger on the 2nd fret of the 3rd string and your 3rd finger on the 3rd fret of the 2nd string. Again, make sure your fingers are right behind the frets, that you are coming down right on the very tips of your fingers, and that your fingers are not brushing up against the neighboring strings. The diagram for this D2 chord is on this page. Strum each string slowly to make sure the chord is clean and clear.

Making Clean Chords
If you are having trouble making these chords clean and clear you can try pulling your elbow closer into your body. This can put your hand in a better position to reach the notes. You might also want to try using the classical method for holding the guitar with a footstool, or standing/sitting with a strap. This will bring the guitar up higher and put it in a better position for reaching the notes too.
Chord Tip: Put the chord on and take it off over and over again. This will help your muscle memory. It’s also a good idea to practice multiple times per day if you can. Try to remember what the chords look and feel like too. Practice consistently and you will have these chords under your fingers for life.
Want to learn more chords? 8 Chords You Must Know.
4. Changing Chords Smoothly
This is one of the biggest trouble areas for newer guitar players so I have two important tips for you.
Chord Changing Tip #1: The first tip is to know the individual chord shapes very well before even trying to switch between them. If you try to switch between the chords before you can go right to the individual shapes on their own you can make the challenge harder and run the risk of getting frustrated.
Chord Changing Tip #2: The next tip is to visualize the chord you are moving to. Think about what that next chord looks like and feels like and then move to it. You will also want to think ahead and anticipate the next chord so that it doesn’t take you by surprise.
If you still find yourself struggling with this, watch this lesson on Changing Chords Smoothly.
5. Your First Song
The final step is to put everything we’ve gone over together and learn your first song. To do this we need to talk about chord progressions.
Chord Progressions
A chord progression is just a specific order of chords that you string together to play a song. This song only uses the two chords that we’ve learned so it’s pretty simple. The basic idea is to play an E minor for one measure “1 2 3 4” and then play a D2 for one measure “1 2 3 4”. You can start by playing whole notes or strumming each chord on the “1” of each measure. Give it a try and don’t forget to count out loud.

That’s it, you are playing real music!
If that was easy you might want to try some quarter note strumming. To do this just strum on each number as you count. You can use all downstrokes or alternating down and upstrokes.
If you want to get into learning more songs on the guitar these Guitar Lessons For Beginners will take you through all the steps you need to take so that you can play 10 Popular Songs With 4 Basic Chords.

Enter your email address below to get Ayla’s free 6 lesson plan and start playing songs on the acoustic guitar in no time!