In this fingerstyle guitar lesson, we'll be taking a look at 3 essential fingerpicking patterns. These important picking patterns are going to help you to develop the dexterity and muscle memory required to play many of your favorite fingerstyle songs.
Pattern #1
For the first pattern, we'll look at we'll just be doing a simple roll. Rolling is important for a number of reasons. Rolling will help you to develop the muscles required to do many other fingerstyle patterns. It's also a great go-to picking pattern when you're playing with other musicians.
To start it's usually best to break rolling up into two sections: Rolling up and rolling down. Let's start by rolling up. You'll use your thumb, index finger, middle finger, then ring finger. Take it slow to start as you build up your dexterity.

Next, we'll do the same thing in the other direction. Rolling down is a little more challenging, so you may need to slow things down a bit. As you get the hang of it, try playing along to a metronome and slowly build up your speed.
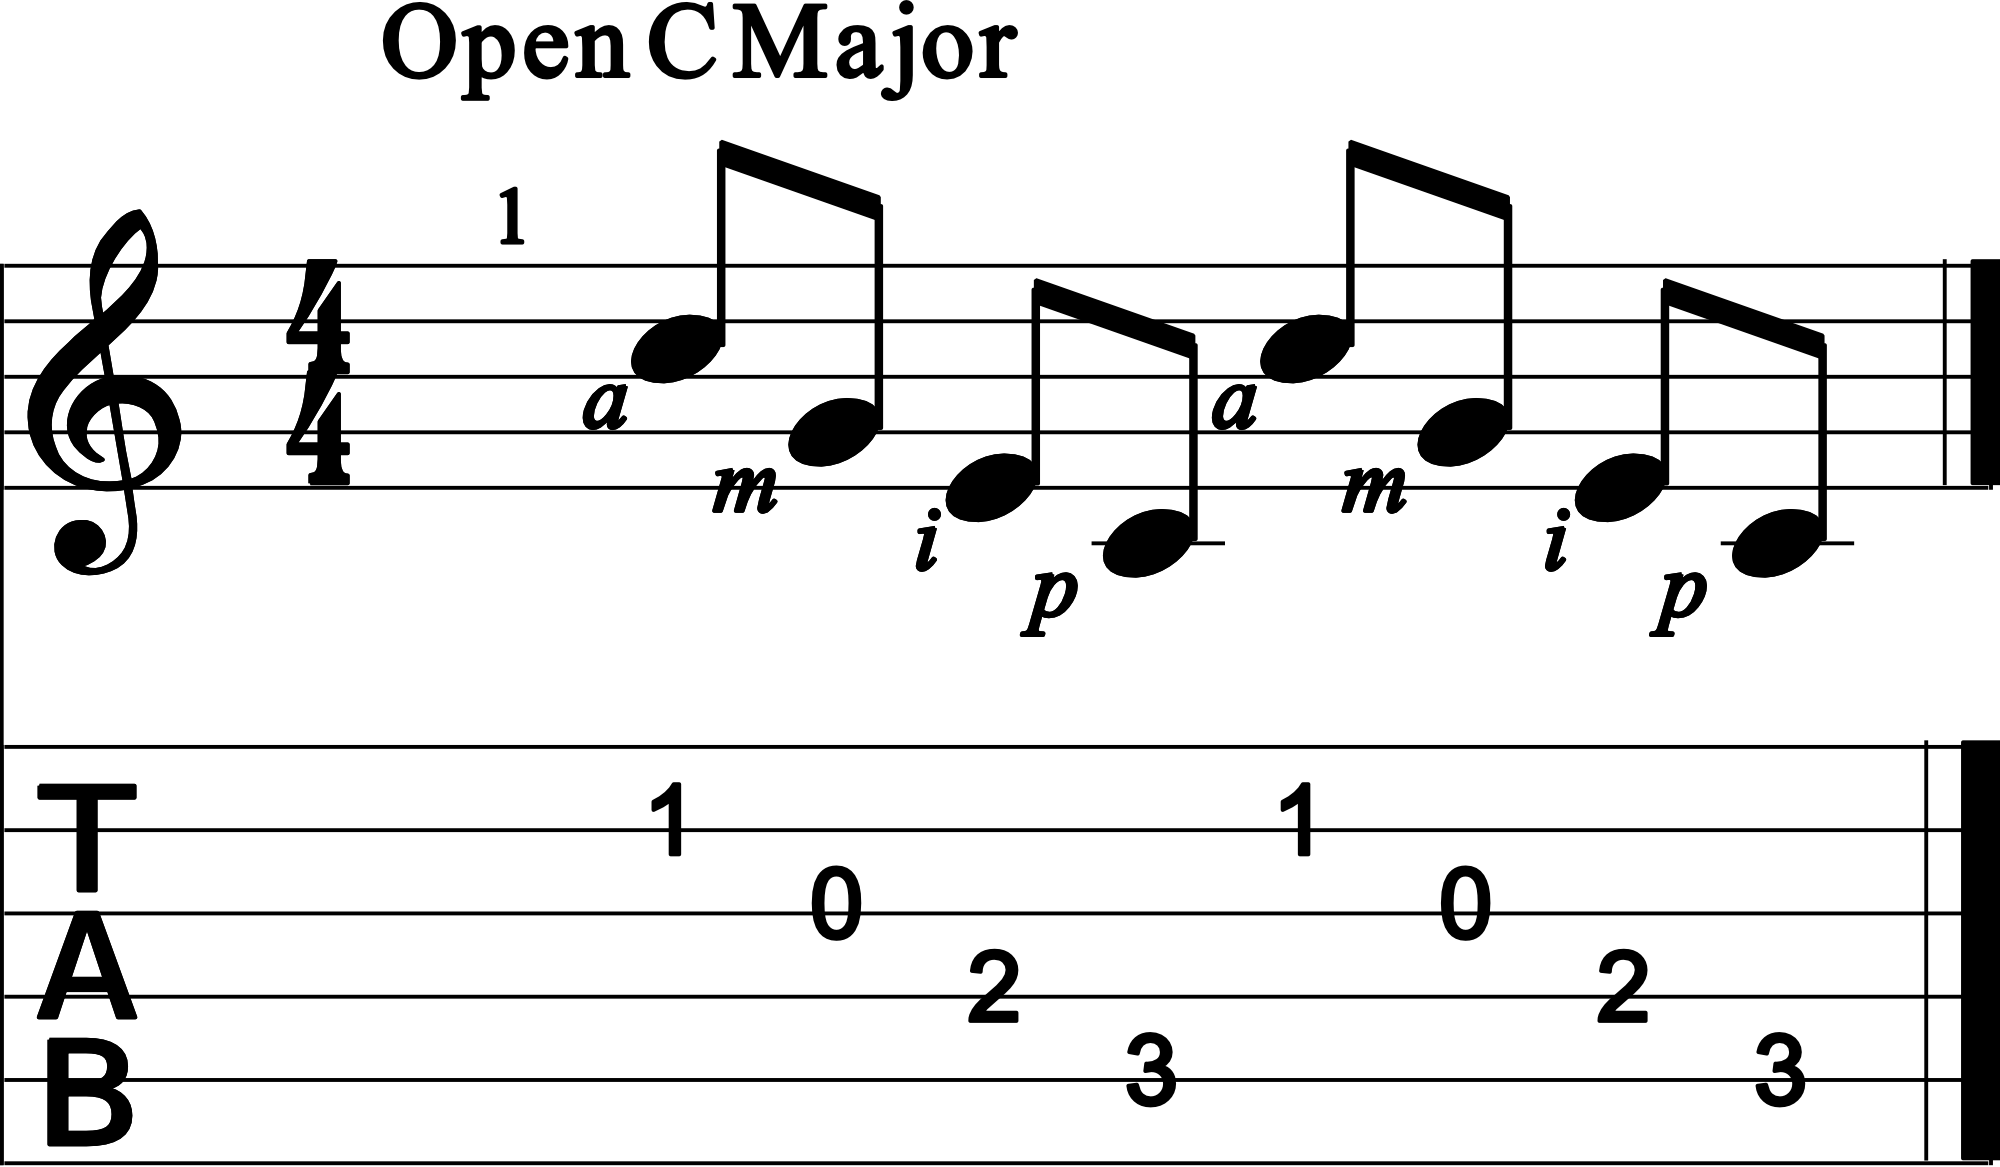
Once you've got the hang of rolling up and down, you can combine them to perform the whole technique. This is the main application you'll use rolling for. You can do this with any chord. Just remember that you may have to use different strings depending on the chord you're playing.

Pattern #2
The next pattern we'll look at is a little more challenging. It's called the 4-step fingerpicking pattern. This pattern will require you to have some more finger independence. We call it the 4-step fingerpicking pattern because there are four motions to perform the whole pattern.
Because of how challenging this pattern can be, we've broken it up into two different exercises. The first one is a more simplified version where you won't alternate strings with your thumb.

Once you've got the hang of this pattern, we'll take it to the next level by adding in another bass string. You'll have to alternate back and forth with your thumb. Again, take it as slowly as you need to. Once you feel like you're getting the hang of it, you can work on playing along to a metronome.

Just like the rolling pattern, you can apply this fingerpicking pattern to any chord. Remember that you may have to make adjustments as to which strings you pick depending on the chord. Once you're ready, you can try using this pattern to play through a full chord progression.
Pattern #3
This last pattern we're going to learn is the basic Travis picking pattern. It's broken down into four steps for you to make it easier to grasp. The first step is to simply use your thumb to play quarter notes.

Step number two should feel familiar since you learned how to do this in the last pattern. All you need to do is alternate bass notes with your thumb between your A and D strings.

The next thing we'll add is a melody note to our alternating picking pattern. Since we're making a C chord, we'll add a C note on our B string. You may need to slow this way down to build up your coordination.

The final step for this standard Travis picking pattern involves adding a few more melody notes on top of your alternating bass notes. The pattern here gets pretty complex, so go through it note by note and measure by measure. Eventually, you'll get to a point where you can play the whole thing along to a metronome so you can build up your speed.

Like the other patterns you've learned, you can apply this same pattern to other chords you know. You'll need to modify it slightly to fit the other chords you want to play. Experiment with it and find the right notes to pick for each chord. When you're ready, you can apply this pattern to a whole chord progression. You'll also want to try this pattern out with different styles of music and different types of chords.

Enter your email address below to get Ayla’s free 6 lesson plan and start playing songs on the acoustic guitar in no time!